Getting Started with Spring Boot


What is Spring?
Spring Framework is a Java platform that provides comprehensive infrastructure support for developing Java applications. Spring handles the infrastructure so you can focus on your application.
What is Spring Boot?
Spring Boot provides a good platform for Java developers to develop a stand-alone and production-grade spring application. You can start with minimum configurations without needing an entire Spring configuration setup. It is developed on top of the core spring framework.
In Spring Boot, everything is auto-configured; no manual configurations are needed.
It offers an annotation-based spring application
Eases dependency management
It includes an Embedded Tomcat Server
Spring Boot Architecture

Client: The client is the computer that requests something from the server.
Presentation Layer: The presentation layer also known as the controller layer handles the HTTP requests, translates the JSON parameter to an object, authenticates the request, and transfers it to the business layer.
Business Layer: The business layer handles all the business logic. It consists of service classes and uses services provided by data access layers. It also performs authorization and validation.
Persistence Layer: The persistence layer contains all the storage logic and translates business objects from and to database rows.
Database Layer: In the database layer, CRUD (create, retrieve, update, delete) operations are performed.
Spring Boot setup
To start with Spring Boot, you can follow the below steps to set up your project:
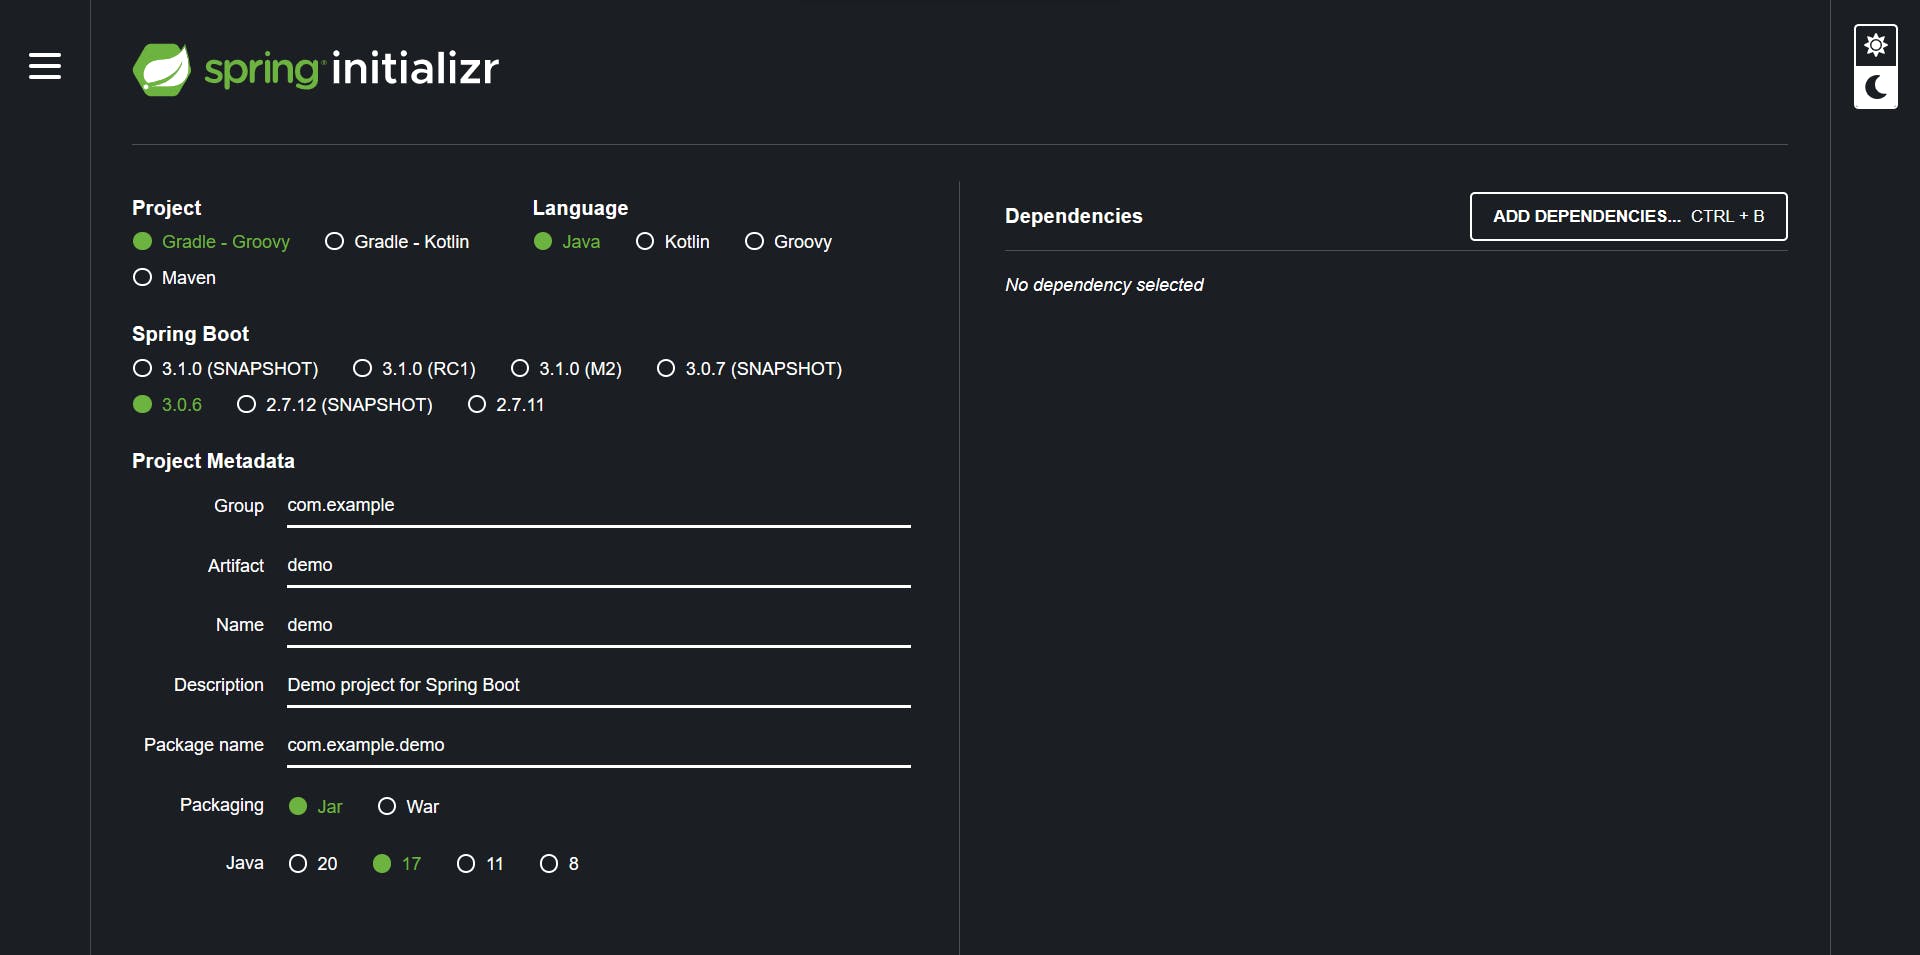
Go to the Spring Initializr website start.spring.io
Select the project type: Maven or Gradle
Choose the Spring Boot version you want to use
Enter the Group and Artifact name for your project
Select the dependencies you need for your project
Click on the Generate button to download the project structure
How does it work?
Spring Boot automatically configures your application based on the dependencies you have added to the project by using @EnableAutoConfiguration annotation.
The entry point of the spring boot application is the class containing @SpringBootApplication annotation and the main method.
Spring Boot automatically scans all the components included in the project by using @ComponentScan annotation.
@SpringBootApplication = @EnableAutoConfiguration + @ComponentScan + @SpringBootConfiguration
Spring Boot starters
Spring Boot provides a number starter pack that can be used while developing an application. These starter packs, when loaded into the classpath, get into action.
The spring Boot framework follows the spring-boot-starter-* pattern for all its starter packs, where “*” can be replaced with the utility provided.
Look at the following Spring Boot starters explained below:
Spring Boot Starter Actuator dependency:
It is used to monitor and manage your application. Its code is shown below −
     <dependency>
            <groupId>org.springframework.boot</groupId>
            <artifactId>spring-boot-starter-actuator</artifactId>
     </dependency>
Spring Boot Starter Security dependency:
It is used for Spring Security. Its code is shown below −
     <dependency>
            <groupId>org.springframework.boot</groupId>
            <artifactId>spring-boot-starter-security</artifactId>
     </dependency>
Spring Boot Starter web dependency:
It is used to write the Rest Endpoints. Its code is shown below −
     <dependency>
            <groupId>org.springframework.boot</groupId>
            <artifactId>spring-boot-starter-web</artifactId>
     </dependency>
Spring Boot Starter Test dependency:
It is used for writing Test cases. Its code is shown below −
     <dependency>
            <groupId>org.springframework.boot</groupId>
            <artifactId>spring-boot-starter-test<artifactId>
     </dependency>
Auto Configuration
Spring Boot Auto Configuration automatically configures your Spring application based on the JAR dependencies you added to the project.
For this purpose, you need to add the @EnableAutoConfiguration annotation or @SpringBootApplication annotation to your main class file. Then, your Spring Boot application will be automatically configured. Observe the following code for a better understanding −
import org.springframework.boot.SpringApplication;
import org.springframework.boot.autoconfigure.EnableAutoConfiguration;

//You can write either of these annotations
//to automatically configure your application
@EnableAutoConfigurationpublic
@SpringBootApplication
class DemoApplication {
          public static void main(String[] args) {
                 SpringApplication.run(DemoApplication.class, args);
               }
}
Spring Boot Application
The entry point of the Spring Boot Application is the class containing @SpringBootApplication annotation. This class should have the main method to run the Spring Boot application. @SpringBootApplication annotation includes @EnableAutoConfiguration, @ComponentScan, and @SpringBootConfiguration annotations.
If you added the @SpringBootApplication annotation to the class, you do not need to add the @EnableAutoConfiguration, @ComponentScan, and @SpringBootConfiguration annotations. Observe the following code for a better understanding −
import org.springframework.boot.SpringApplication;
import org.springframework.boot.autoconfigure.SpringBootApplication;
@SpringBootApplicationpublic
class DemoApplication {
public static void main(String[] args) {
SpringApplication.run(DemoApplication.class, args);
}
}
Core Spring framework annotations
Bean
@Bean is an annotation that is used on the top of a method and can act as a replacement for the XML </bean> element. to declare a bean, simply annotate the method with @Bean annotation.
import org.springframework.boot.SpringApplication;
import org.springframework.context.annotation.Bean;
import org.springframework.context.annotation.Configuration;@Configuration
class DemoApplication {
@Bean
public static void main(String[] args) {
SpringApplication.run(DemoApplication.class, args);
}
}}
}
Autowired
@autowired is used to make a constructor, field, or setter method to get autowired by Spring Dependency Injection.
public class SpellChecker {
   public SpellChecker(){
      System.out.println("Inside SpellChecker constructor." );
   }
   public void checkSpelling(){
      System.out.println("Inside checkSpelling." );
   }
}
import org.springframework.beans.factory.annotation.Autowired;
class DemoApplication {
@Autowired
   private SpellChecker spellChecker;
}
}
Component Scan
Spring Boot application scans all the beans and package declarations when the application initializes. You need to add the @ComponentScan annotation for your class file to scan the components added to your project.
Observe the following code for a better understanding −
import org.springframework.boot.SpringApplication;
import org.springframework.context.annotation.ComponentScan;
@ComponentScanpublic
class DemoApplication {
public static void main(String[] args) {
SpringApplication.run(DemoApplication.class, args);
}
}